Watching 3D Blu ray movies in fairly simple process nowadays, what you need is a 3D compatible TV set, Blu ray player, 3D glasses and a 3D Blu ray movie. If you have got some great movie resources and want to enjoy on your Blu ray player with 3D effect what should you do to burn video to Blu ray with 3D effect?
To burn 3D Blu ray on Mac is quite easy with the help of 3D Blu ray burner. It provides multiple 3D effects to meet different 3D glasses’ need. And personalized video editor and menu customizer are built in for bettering the output effect. Following we will share you how to burn 3D Blu ray on Mac with 3D Blu ray burner for Mac.
Download and install 3D Blu ray burner for Mac.
Download and install 3D Blu ray burner for Win.
How to burn 3D Blu ray on Mac?
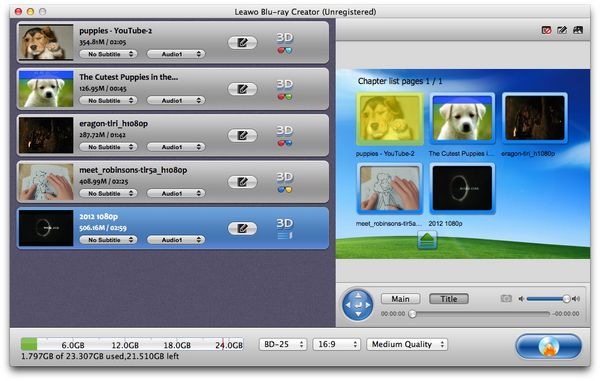
Step1. Import video files
Two ways to import video files in:
1) Click on the “Add Video” button to add files to the program for burning.
2) Directly drag and drop videos to the program.
Step2. Edit video files
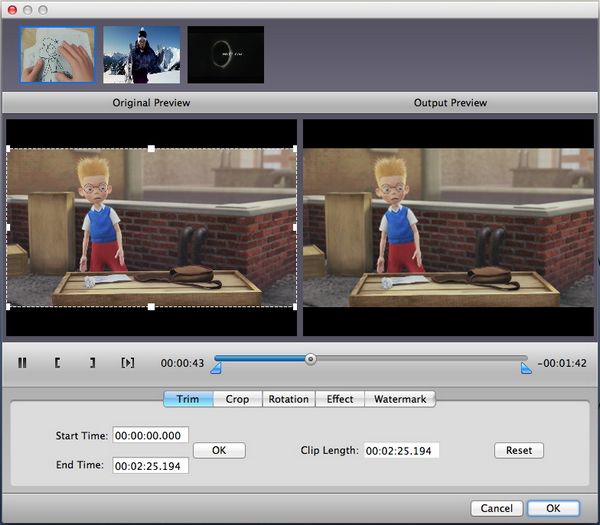
Click “Edit” button before 3D button to improve video effect: Trim, Crop, Effect, Rotation, and Watermark.
Step3. 3D settings
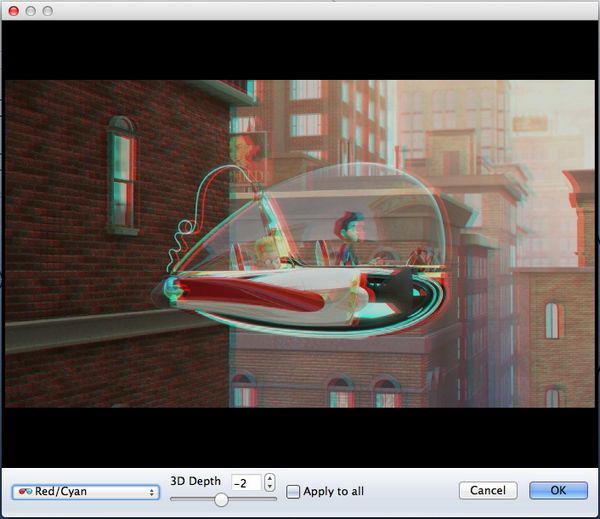
Click “3D” button to choose 3D models among Red/Cyan, Red/Green, Red/Blue, Blue/Yellow, Interleaved. You are also able to get a satisfied 3D Depth effect by setting value in 3D Depth box or by dragging the 3D Depth slider.
Step4. Menu customizing
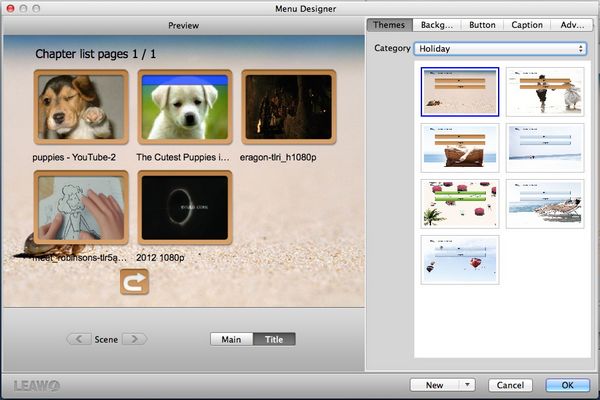
Click the Edit button on the preview window to enter Menu edit panel, where you can select your preferred menu or customize the menu in your desire.
Step5. Settings
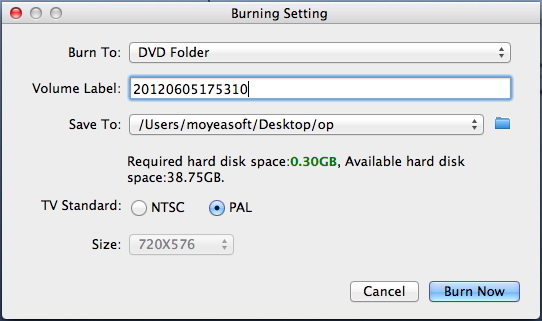
Click on the “Burn to DVD & Blu-ray” button and the Burning Setting interface will pop up. You can carry out the following settings:
“Burn to”: DVD Disc/Folder, Blu-ray Disc/Folder, or ISO File
“Volume Label”: input your own volume label
“Save to”: choose a path on Mac to save output file
“TV Standard”: select NTSC or PAL TV Standard according to region
Step6. Burn 3D Blu ray on Mac
Click on the “Burn Now” button to start to burn 3D Blu ray on Mac.
Comments are closed.