To keep collected Blu ray and DVD disc to hard drive is a best choice for preserving DVD and Blu ray source. When converting Blu ray and DVD disc to hard drive, the common question people always have is how to convert Blu ray and DVD to hard drive without quality loss. In the following post, a step-by-step guide will show you how to convert Blu ray and DVD to hard drive without quality loss with Leawo Blu ray Ripper.
Download and install Leawo Blu ray Ripper.
Download and install Leawo Blu ray Ripper for Mac.
Guide: How to convert Blu ray and DVD to hard drive without quality loss
1. Import Blu ray/DVD to the program
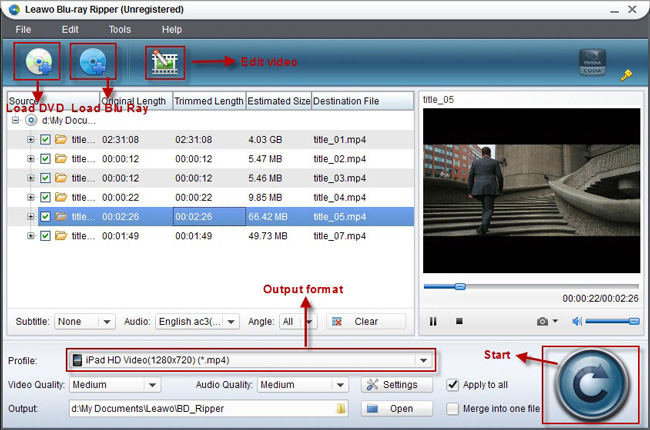
Insert Blu ray/DVD disc to your external BD drive or DVD drive. Launch Blu ray Ripper, and click “Load BD” or “Load DVD” to import BD/DVD to the program. The largest M2TS file will be the main movie; you could preview it by double clicking the file name. In the meantime, choose your preferred audio tracks and subtitles it provided.

2. Choose an output format
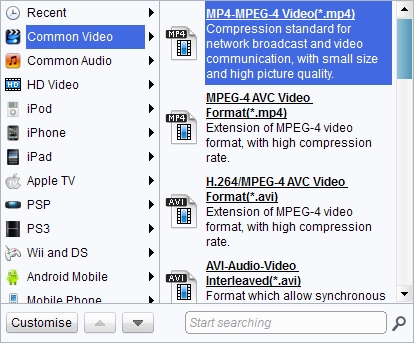
Go to the drop down box of “Profile” and choose an output effect in “Profile” such as MP4, MKV, AVI, etc. in your desire.

3. Settings
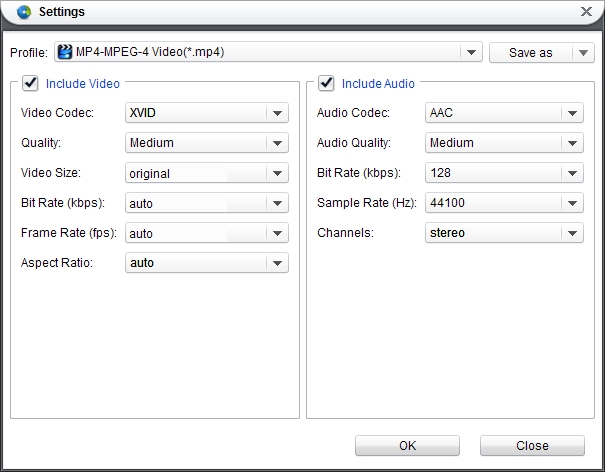
To make parameters more exact, you can click “Settings” button to set the video size, bit rate, frame rate, audio codec, etc. if you are master of this field.

4. Convert Blu ray/DVD to hard drive
Then just click “Convert” button to begin Blu ray/DVD to hard drive conversion. Ripping a Blu-ray disc could cost hours, so please be patient. After ripping completed, you may click on “Open” button to find the unprotected Blu ray/DVD videos.
Comments are closed.